CONNECTING A RASPBERRY PI DEVICE TO THE CLOUD
- Layout for this exercise:
1 - Setting a Thinger.io account
- Thinger.io is a free and open-source platform for the Internet of Things:
https://thinger.io/
- Thinger.io provides a ready to go scalable cloud infrastructure that can be controlled with an easy to use admin console, or integrated into a business logic with REST API.
- The entire project is open-source and does not depend on any specific hardware, what avoids the need to select a compatible vendor hardware:


- Signing up for a Thinger.io account, a name, email and password must be provided:

2 - Adding a device
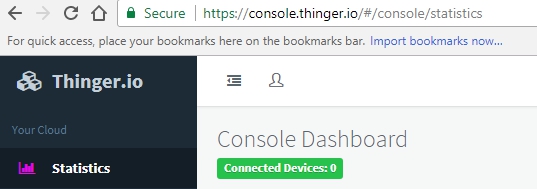
- At first no device is connected:
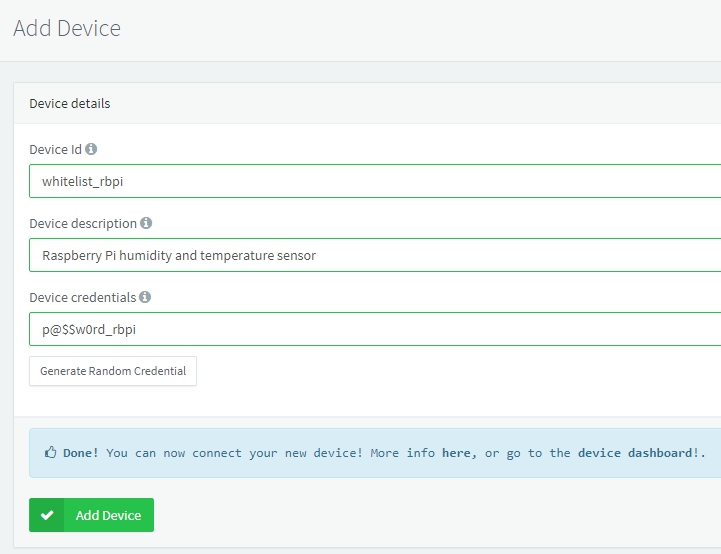
- Adding a device:

- Some parameters must be entered, like Device Id, description and credentials (the last one can be generated either manually or randomly):
- For accessing the Dashboard just click the words "device dashboard". As expected, no data/output is available at this moment:


3 - Connecting Raspberry Pi 3 to Thinger.io
- Going to the Raspberry Pi command line, let's install some updates and dependencies:

- Compiler for C and C++:

- CMake is a cross-platform build system generator:

- libssl-dev package is part of the OpenSSL project's implementation of the SSL and TLS cryptographic protocols for secure communication over the Internet, containing development libraries, header files, and man pages for libssl and libcrypto:

- Finally, downloading the thinger-io application from GitHub:

- Unzipping:

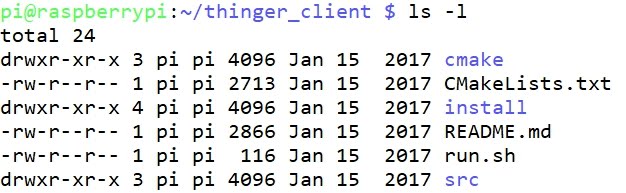
- Renaming the folder Linux-Client-master to thinger_client:

- The folder contents some files and subfolders:
- Inside src there is the main C++ program of the thinger.io application:

- Editing:

- The library thinger/thinger.h allows to connect the Raspberry Pi to the thinger.io IoT Platform:

- These 3 parameters must be introduced from the thinger.io account creation at point 2 (Adding a device) of this exercise:

- Eventually, the main.cpp file is like this:
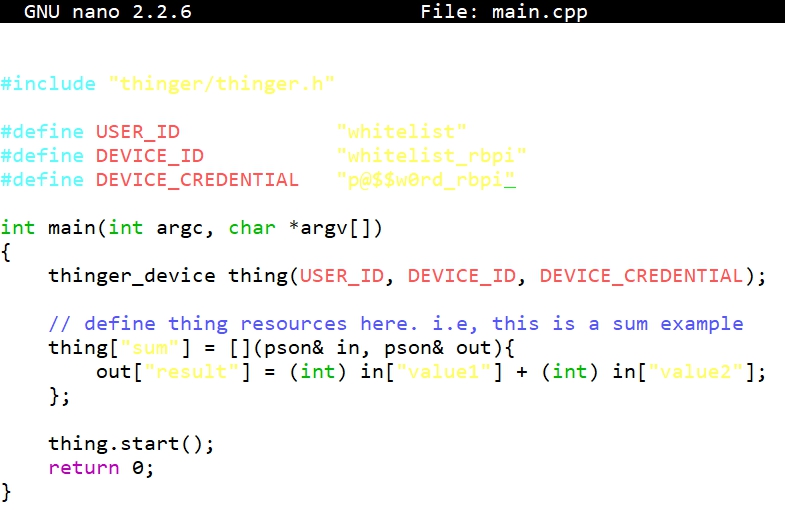
- Let's notice that this application simply adds two numbers and outputs the result:

- pson is a variable type that can contain booleans, numbers, floats, strings, or even structured information like in a json document.
- The operator = defines a function that has both input and output. In this case the function takes two different pson parameters. One for input data and another one for output data.
- The pson structure can store values with keys, like any json document. The result provides a value in sum key, that it is translated to json when accessed them from the API.
- Going back one level into the folder path, there is the script run.sh:

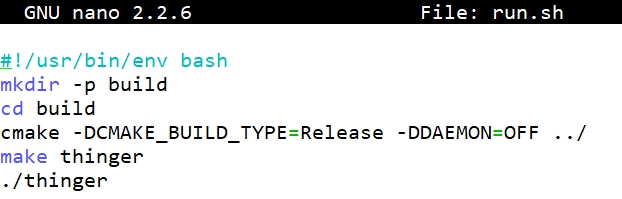
- Giving execution permissions to run.sh:

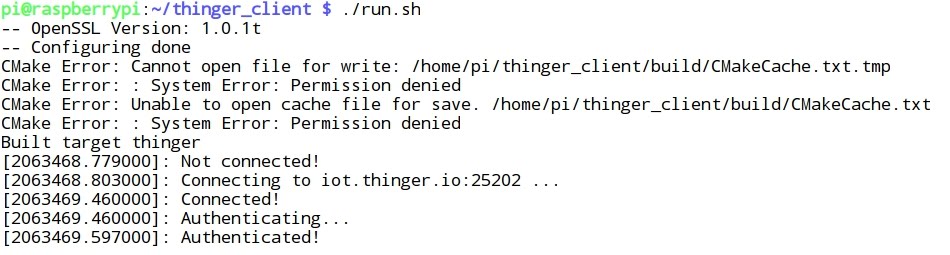
- Running the script, finally the connection between the Raspberry Pi device/application and the Thinger.io IoT platform is successful:
4 - Testing and running the application
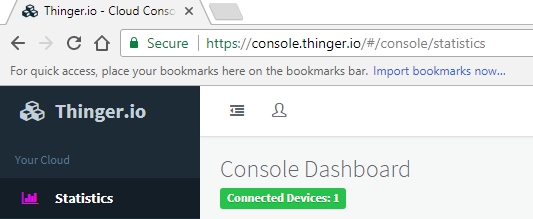
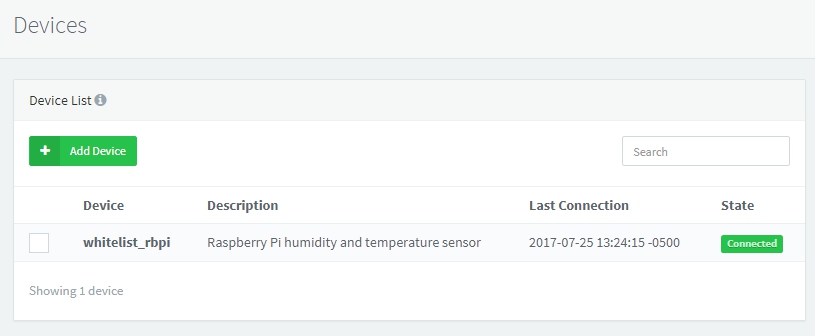
- After performing previous steps, now the connected device whitelist_rbpi is found at the Console Dashboard:

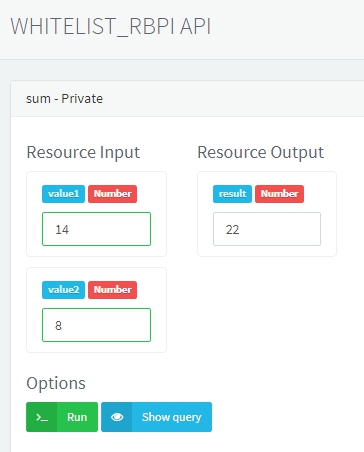
- Clicking View API two values can be introduced, and clicking Run the sum of the two numbers is displayed:

- Clicking Show query displays the REST API calls done by the console while interacting with the device. These calls can be used and integrated in other programs, like clients in .NET, PHP, Node.JS, C++, C, bash, ...:
